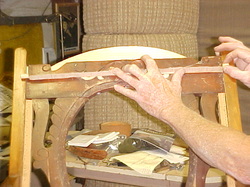
Repair comes before recover. The broken top was removed low enough to allow room for the newly designed top. A straight edge board was screwed to the part to be saved. The top edge became my cutting guide.
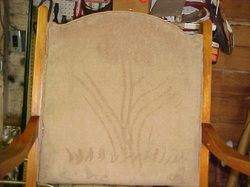
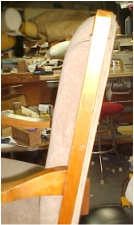
The top of the arc is the same height as the two outside edges.
Measuring at the top and bottom of the back reads 18 inches at both places.
"How am I going to _?_ " becomes a constant question. Sometimes they come more than one at a time. How to finish the top? How to staple the fabric inside of the arms? How to close that hole? How do I want to pad the back?
I like the topline
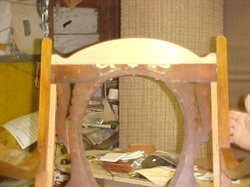
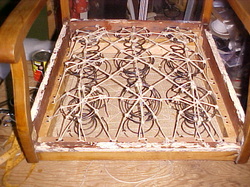
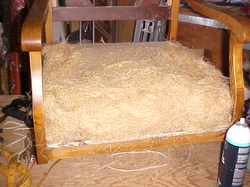
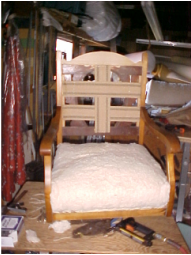
It came as an open hole. The white edges are the wood filler needed to fill all of the holes from previous recovers. New boards were added to the inside edges with glue and screws. The base for the springs is burlap cut to shape. 20 inches (") at the front, to 18" at the back. The double layer is sewn together in a square spiral. There is also 4" webbing under each course of springs front to back and side to side. It came with six springs. It really needs nine. Each spring is tied to eight ways with the best Italian flax twine available. There are times to do it right the first time. Sometimes corners can be cut without affecting the end product. This is NOT one of them. There is no reason not to expect it to last for fifty years. Each spring is clipped to the base at three points. From empty hole to what you see is six hours.
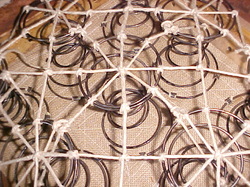
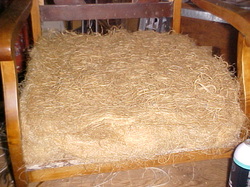
Notice the knots between the center spring and the ones to either side. If that area is not tied, there is a noticeable hole when it is padded. It would have had more holes than springs with only six springs. The knot is easy to do and easy to adjust. The last run over each spring gets a knot in the center to make sure the center of the spring doesn't move and make a hole. The knot is a timberhitch. There are sometimes a clove hitch is used. A square knot is NEVER used. Where there is motion, a square hitch will work loose. Not Good...
This is some of the original excelsior which was clean and free of any odors. The front end was too slanted, so it needs to be ) rather than \.
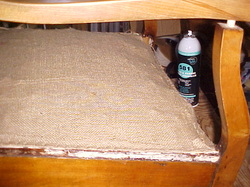
Lumps and low spots through the layer of burlap covering all of my beautiful spring work need to be padded away. Yes, I see the arm needs some glue on the dowel before putting it back in position. No, not spray glue. Woodworker's yellow glue works best.
The / \ sides also need to be more [ ] . Pad and pat until it feels right.
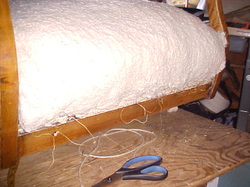
A 3/4" layer of cotton will even everything and also cover the stuff which could poke through the fabric. Notice how that corner slopes? More cotton.
There is a 1/4" layer of insulation pad and then another layer of cotton. There is also some webbing across the back.
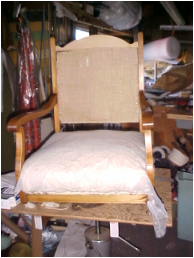
One layer of burlap is enough for the back. There is a very thin layer of a non woven material over the cotton. The backside of the fabric will not move the cotton when the fabric is stretched and tightened over it.
The top of the wood has a piece of the insulpad over it, and a piece of the fabric laps over and is stapled in place. The foam is 2" thick. ] needs to become > . The edges are sprayed with a spray which will not leave a hard edge. Some spray glues have a long open window (time before it dries)
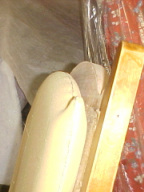
For this application a quick time for it to become tacky is preferred. Lay the foam on a flat surface and begin to push the edges together. If the glue is wet, the bond will not hold. Push all of the edges together. Thicker foam makes a more rounded edge. It is even with the bottom, but 1/2" narrower on the sides and top. The outside trim will be placed in that 1/2" strip. I use a bandsaw with a 3/8" wide blade so I can cut the corners and have it be straight up and down. An electric knife is second best. A regular knife or scissors really are not smooth enough to get good shaping.
For this application a quick time for it to become tacky is preferred. Lay the foam on a flat surface and begin to push the edges together. If the glue is wet, the bond will not hold. Push all of the edges together. Thicker foam makes a more rounded edge. It is even with the bottom, but 1/2" narrower on the sides and top. The outside trim will be placed in that 1/2" strip. I use a bandsaw with a 3/8" wide blade so I can cut the corners and have it be straight up and down. An electric knife is second best. A regular knife or scissors really are not smooth enough to get good shaping.
Over the foam is a layer of cotton and slink. The 1/2" border is needed to staple the fabric directly to the frame. The staples need to be very close together. Wherever the fabric is not secured, the edge develops high and low spots. A 33 wire or 31 wire pneumatic stapler is much thinner than the 50 wire staples from electric or hand held staplers. For really hard wood, neither electric or hand staplers will set the staple deep enough for the flat crown between the legs to hold. Because the wood is hard, 1/4" length legs will hold. I am also coming back over the edges with a 5/8" leg staple when attaching the double welt edge. The foam gets really compressed to be able to staple the fabric behind the arms. One hand just pushes it as flat as it will go while keeping the fabric to the outside edge. The other hand is holding the stapler. Because the fabric was cut so there would be even pressure when it just touched the edge of the showing wood, when the edge of the fabric is kept to the edge, when the foam expands , it will still be smooth .All of this is done with the chair on its back. Let gravity work for rather than against you.
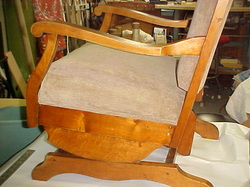
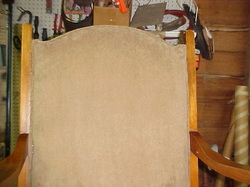
The side view shows side welting, but it also shows the profile of the lower back. It is headed for a woman in California. The chair was bought new in 1941. It took most of 2 1/2 yards to do it.
There is a nap to this fabric. Up strokes change the colour. Who needs finger paint? The smooth should go down the back and toward the front of the seat. The other way can be embarrasing to anyone in a skirt or a kilt when they slide forward to get out of the chair.
With a wipe of the hand it is all gone. The double welt is around the back in one piece. Where there needs to be a tight corner, crush the inner side of the welt with needle nosed pliers so it bends sharply. Double welt from the end looks like OO, so the staple is buried in the middle OsO. A narrow crown staple lets staples follow tight bends. The distance between legs is only 1/4". When they are stacked with the legs down, the tops can be spray painted to match the fabric colour. A black Marks a Lot works well for black fabric.
Did you notice the piece of welt on the bottom edge of the wood below the seat?
Did you notice the piece of welt on the bottom edge of the wood below the seat?
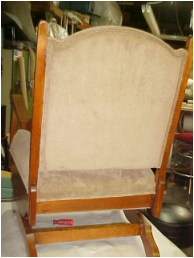
There is one piece of welt around the edge of the back as well. The back has only 1/2" of foam over it for padding. The hole was covered with a single layer of burlap, but not webbed. The bottom board also has a finished piece of welt below it. If you look closely, the top of the rocker is sitting at an angle to the base. Time for the next to the last _?_
Close examination found one side with 8 loops and the other with seven. One of them was an inch closer to the front than the other on the body of the chair. New holes were drilled and the one side was repositioned.
Close examination found one side with 8 loops and the other with seven. One of them was an inch closer to the front than the other on the body of the chair. New holes were drilled and the one side was repositioned.
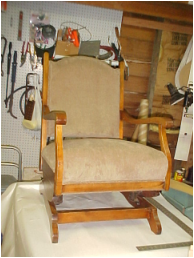
Here's a profile of the top. This chair is too graceful for just a flat top. Time for the last _?_ .
How much for labour and materials? We had agreed on a ballpark low and high figure based upon the SWAG method. It was nice to see it be $7 below the lower figure.
Thank you for following the progress. If you would like to make an oddesey of your own, see the next page about Upholstery Classes.
How much for labour and materials? We had agreed on a ballpark low and high figure based upon the SWAG method. It was nice to see it be $7 below the lower figure.
Thank you for following the progress. If you would like to make an oddesey of your own, see the next page about Upholstery Classes.
